Wednesday, December 26, 2012

Photo Album

https://itunes.apple.com/ca/app/photo-table/id455322208
I recently purchased an iPad and I find myself using it more often than I do with my notebook, although, for things like this (blogging or any fair amount of typing) I still prefer my notebook.  Actually, Blogger does not like the iPad.  I cannot open this window in iPad without some error, so I don't have much of a choice anyway! :-)

Anyhow, on the iPad, there are a number of free photo album apps that can be downloaded from the Apple Store.  This one that I downloaded yesterday is called Photo Table.  It is neat.  It supports a number of features I have not started to use yet, including creating collages that you can share via Facebook, Twitter and e-mail, as well as printing and shipping postcards.  It also has support for the iPhone.

I only use the app to download some Flickr albums--the download is quick because my Flickr photos have been downsized already.  It can also download photos from Facebook but I do not store any photos on Facebook.  The "neat" thing about it is how photos are laid out on the virtual table.  The photos are strewn on the virtual table as if you had dropped a bunch of photos onto it.  From there, you use your fingers to go through the photos.

There are finger gestures to expand, shrink, rotate, and discard (throw to the bottom) photos.  There is also a quick way to start up a photo slide.  I find this app fun to use.  The virtual table looks a little messy but it is a fun way to show photos to families and friends.

The app is free.  Try it out at https://itunes.apple.com/ca/app/photo-table/id455322208?mt=8

Happy Holidays!

Sunday, December 2, 2012

Storage

I have been storing my camera gears in a bottom drawer of a (clothes) dresser in my bedroom.  At first, it worked well as I have only a few equipment.  For about a year now or possibly more, I have been keeping most of my equipment on top of a table.  I then place a foam board on top to protect it from dust.  The table looked pretty messy and recently, a friend's house got broken into and some valuables were stolen.  I thought, if my house got broken into and the thief goes straight to the bedrooms, the first thing they will see are my camera gears.  It was time to do something about my camera equipment.

$16 Sterilite 3-Drawer Tower
Today, I went to Walmart and bought this Sterilite 3-drawer plastic tower.  It does not look exactly what is shown on the right as mine has three same drawers and the frame is white while the compartments have a dark blue tint so if there are any sunlight, it will keep the interior somewhat cool and dark, and away from prying eyes.  The tower is all plastic so it does bend and wobble when you pull out a drawer, but it is sturdy enough for my cameras and lenses and various other gears.  The tower also has casters so it can be rolled around although the wheels are also all plastic so it does not roll around as smoothly as rubber and steel casters.

Anyways, I managed to fit most of my equipment in one tower.  I placed the silica gel I bought from ebay into the compartments where the camera bodies and lenses are.

I still have batteries and small accessories sitting on the table, and there are other stuff still in my dresser.  I will go back to Walmart tomorrow to pick up another tower.

Sunday, November 25, 2012

Dust bunnies at macro level

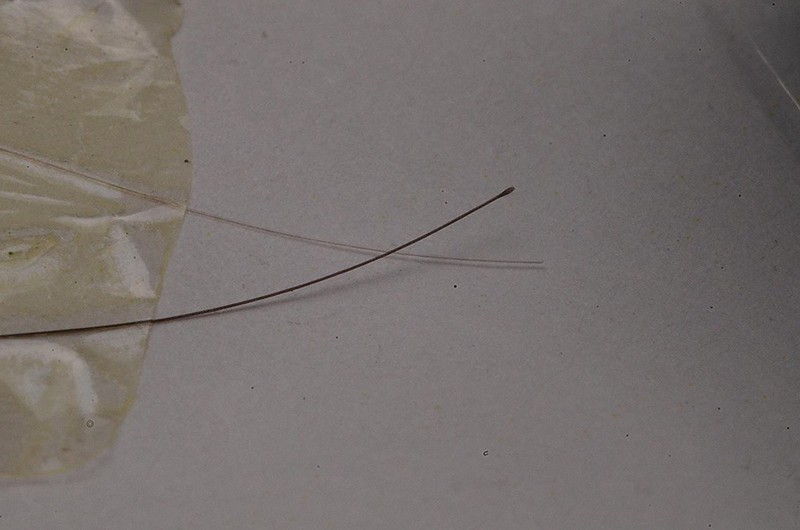
Macro shot of my hair.
Talk about dirty!  This morning while I was combing my hair, I picked out one strand of hair from my comb.  It was interesting looking because the tip of the hair was white (yeah, I have gray hair since I was 24) and the base of the hair was black!  This was a second time I saw one of these hair strands like that.  Am I getting younger???

In any case, it was interesting enough I had to take a shot of it to document the anomalous growth.  I decided to use the Nikkor 105mm lens.  I thought it could do 1:1 reproduction but for some reason I could not get really close to the hair so I added an extension tube.

What came out was a little surprising.  Yes, I got my shot to demonstrate the weird change in colour but I also got a ton of dust dunnies in the photo!  All those really dark spots in the photo are dust bunnies!  They do appear at f/32 on my 18-200mm lens but they are a lot more apparent at the macro level.  Holy molly, I initially thought they were black spots on the paper that the hair was taped on but no, those were on my sensor!  Ok, time to do another wet cleaning.

Why do I get so much dust inside my camera???

Sunday, November 11, 2012

Wet cleaning, the danger of

I almost had a heart attack Friday night.  To prepare for Saturday, I checked my sensor for dusty bunnies.  I don't know how but my sensor attracts so much dust.  Everytime it's time for me to check for dust, I can be certain that there will be some annoying dust spots to clean.  If they are not visible at f/14 or so, I am usually not all too worried but these were.  So, I took out my wet cleaning kit.  I first used an air blower to remove loose particulates.  The Arctic Butterfly followed but I think it was picking up something on the side of the sensor and deposited it onto the sensor and smeared it as well.  Well, that guaranteed that I had to use a wet cleaning method then.

As usual, I opened the menu to lock the mirror up for cleaning and proceeded to do the cleaning.  My heart dropped when all of a sudden the shutter closed on me!  The PecPad covered end of the spatula was now stuck inside my camera.  I was not sure at the time what was closing down onto the spatula but it looked like the shutter door with four panels.  I managed to pull the spatula out and lucky me, the camera was still functional.  A bunch of tests showed no damage to the shutter mechanism.

I think I made the following mistake.  I once set the D7000 on manual mode, opening the aperture to shoot stars for 20 seconds.  To remove my lens, I set the mode to manual from my usual Aperture Priority mode.  When I then set the camera to cleaning mode, I must have pressed the shutter release button before actually activating the cleaning mode.  When I thought the camera had gone into sensor cleaning mode, it was actually taking a picture for 20 seconds!  What a mistake I made, one I will not forget anytime soon!

Wireless triggers, CT-04, part II

For the first time, I was shooting portraits manually and putting an untested faith in the setup.  For the wedding yesterday, we had a photo shoot at home.  That was my first real use of the Neewer CT-04 trigger / 3 receivers.  This trigger / receiver combination worked fine.  It was simple to set up.  Because the light came from my flashguns only and not from the pop-up flash, I had to use my camera in manual mode.  I fixed the wireless trigger on the hot shoe of the camera.  On the receiver side, I used all the receivers.  I set up two umbrellas about a couple of metres in front on either side of the subjects.  The right umbrella has my Nikon SB-900 flashgun on manual mode at full power whereas the left has my Nikon SB-800 on manual mode at half power.  I placed one SB-25 in the background against the wall.  It was by no way a perfect setup.  I have no light meter so I had to guess the f-stop and had to take a number of shots to test the exposure.  Once I had a setting that worked (by visually inspecting test shots), I kept it for the duration of the shoot.  The light exposure was consistent but whenever I shoot too quick, neither flashgun was fast enough to recharge themselves so I got a couple of black pictures.  Also, as long as I keep shooting the CT-04 receivers will happily stay online.  I am not sure how long but if I stop shooting the receivers will go into power saving mode and wake up on one trigger.  That was not a problem.


Tamron 17-50mm Di II VC, part IV

I wrote how this lens is sharp and pretty good for its price.  Now, I know why professionals rely on the Nikkor 17-55mm f/2.8 instead.  I took this lens out for the wedding last night and was I disappointed.  Some shots were sharp but most where blurry because it could not focus properly in darker conditions.  It was not like it could not focus.  The camera sensed that the focus was on and allowed me to trigger the shutter.  The lens seemed to have mis-focused and was also hunting quite a bit before it locked on something.  I missed a number of shots and unfortunately those opportunities are forever gone.  As soon as I put the Nikkor 18-200mm lens back on, I was shooting like a pro--no missed shot, focus was spot on.  I only wished the Tamron was able to seek focus as accurately and as fast as the Nikkor but I would only be dreaming.  I think this Tamron is on its way out.  It looks like I will have to spend the extra dollars to get the quality and speed I want.

Friday, November 9, 2012

Wireless triggers, CT-04

Neewer wireless trigger opened up
One of my cousins will be tying the knot tomorrow.  I am getting my gears ready for some shooting.  One of the gears I will be using is this set of a Neewer wireless trigger and three CT-04 receivers that I bought a while ago.  I have never made the opportunity to use them yet and now when I could use them, it's not working.  Darn, I think it's time to replace the batteries.

To replace the battery that came with the Neewer wireless trigger, I had to remove a screw hidden underneath  the "QC Pass" sticker on the bottom of the trigger.  The case opens up easily, revealing a circuit board inside and a small 12V 23A battery.  I have never seen such a battery before.  I am going to go to my local electronics store and hopefully be able to find one there.  I imagine a battery like this would be more expensive than the typical AAA or AA batteries.  More shopping to do ....

[ An hour later ... ]

Well, I just got back from the local electronics store.  They carry these ATC Alkaline Max batteries for $2 a piece!  Very expensive battery!  I bought two, and we're good to go now.

Sunday, October 28, 2012

Hip camera holster

"Pro Quick Hunter Shoot Good Partner Camera Holster Belt Kit" from ebay
I was researching on ebay (I think that is the right spelling of "eBay" as it was called before) for a d-ring to screw into the tripod mount socket of my camera when I came across this holster.  It's the Good Partner Camera Holster.  It sounds goofy and all but it does look cool.  I have seen some wedding photographers carry their cameras on their belt before.  I thought that was cool and so I guess this is what they used.  I did a bit of research on Google and found out it was probably a knock-off of the SpiderPro Single Camera System.  What's new.

The SpiderPro system comes with a belt.  This knock-off does not.  If I buy this knock-off, I'd use it with my leather belt, which is far stronger than SpiderPro's belt with a plastic snapping buckle.  I cannot understand why the pros trust this kind of belt with their pro DSLR bodies and lenses.  I guess they check for cracks in the buckle everytime they use it?  I had one plastic buckle break on me once.  Maybe it was cheap plastic that got brittle over time.

Anyways, I am contemplating at getting one of these hip holsters now.  I already have a fairly good camera strap.  This hip holster would be for a second camera that I carry from time to time.

Saturday, October 27, 2012

Preventing fungus in the lens

My lenses are still clear, edge to edge.  There is no fungus that I can see.  I hope to be able to keep it that way forever.  However, as I was shooting in the rain again yesterday, I was thinking I was just asking for trouble.  With a plastic cover over the lens or not, there is still quite a bit of moisture that the lens can draw in and out of the lens barrel.  It's worse if there are rain drops on the lens, and of course, there were.  I tried to keep the lens dry as much as I could but there was nothing I could do to keep moisture out.  When I got back to the car, I could see there were moisture inside the lens again.  Zooming in and out extends and contracts the barrel and moisture can be seen on the barrel.

I believe all the moisture has been drawn out now, but to be sure, I will keep the lens extended out to allow as much moisture to escape as possible.  I left the lens sitting on my bed.  It is a dry environment so hopefully the moisture will naturally escape from the lens.

To deter fungus formation, a lens should be kept in a dry and cool environment.  To help with that, I just purchased from eBay a couple of silica gel boxes.  These blue silica gel beads turn red after absorbing moisture from the air.  They advertise that the gel can be dehydrated back to their blue colour with a microwave oven.  In addition to these two silica gel boxes, I will order 100 small sachets of white silica gel.  These blue gel beads will be my indicator that the gel need to be dried out so when I dry the blue gel I will dry the normal white gel at the same time.

Blue silica gel that will turn red with moisture.

I cannot wait for these blue gel to arrive.  I think they look pretty cool!  I will like to take some macro photos of them.

Sunday, October 21, 2012

Choosing a lens, part 3

Sigma 50-150mm f/2.8 DC OS
I think I have also made up my mind that I will not buy the Nikkor 70-200mm f/2.8.  It is an excellent lens, just not for me, not for a DX camera body.  The 70-200mm on the DX body would be like a 105-300mm on a FX body.  If I were using it in a wedding shoot, I would be missing a fairly important range.

I already have a Tamron 17-50mm f/2.8 VC.  It is a great lens.  The vibration compensation mechanism is not as good as Nikon's but then again, the Nikkor 17-55mm DX does not have any VR.  I ran some handheld tests today and like I said before, VR is a big deal.

What about the upper focal range?  I'm thinking the Sigma 50-150mm f/2.8 DC OS would fill this gap really well.  I have seen only great reviews of this lens and by the way, this is the "DC" version. This lens is sharp throughout the range, even wide open.  I would use it in combination with the Tamron 17-50mm for wedding shoots.  Together, they are similar to the 24-70mm and 70-200mm combination on FX bodies.

Now, where am I going to find this lens?  I'm very hesitant to pay the retail price of about $1200.  The purpose of this lens for me would really be for the occasional weddings and conferences.  I see using it for mostly indoor shoots, and even then, I would use my all purpose 18-200mm for parties.  I would not use the Sigma 50-150mm or the Tamron 17-50mm for hiking, camping, traveling, and nature photography either.  For that, I use my Nikkor 18-200mm and Sigma 10-20mm lenses.  In these types of photography, there is less of a need for the f/2.8 aperture.

So, I'm looking for a second hand version from someone upgrading to an FX body.  I don't see it anywhere yet.

Saturday, October 20, 2012

Nikkor 18-200mm after the drop

Last year, I wrote about removing a dented filter from my Nikkor 18-200mm lens (see:  Photon Farmers: Stuck filter on lens.)  I thought I'd write a bit about the lens after one and a half years later.

You gotta give it to Nikon.  They do make a really solid lens, even if it's mostly plastic!  The force of the impact from the drop dented the filter enough that its rim is warped.  The filter does not thread into the lens barrel easily now, although I could still use it.  Immediately after the drop, I could feel something was not right with the lens.  The focus ring felt a bit gritty.  Whenever I use it, it feels as if there are tiny bits of sand inside.  It does not seem to affect much anything anyway so I do not care much about the gritty feel.  However, there is something I noticed on one camping trip while I was shooting the stars at night.  The lens used to be able to focus to infinity without a problem.  My shots of the stars were all blurry.  All the images were out of focus.  Also, when I turn the focus ring manually, the focal length indicator inside the lens does not turn sometimes.  I never had this problem before the drop so I guess there was some damage.  Besides that though, everything about the lens is working fine.  The VR is still working smoothly.  The zooming is fine too.  The lens is still my primary go-to lens.  I use it for almost everything I do these days, whether it's for a party or for a hike.  So, hats off to Nikon for building such a solid lens!

Thursday, October 18, 2012

Choosing a lens, part 2

I think I have made up my mind.  I will not purchase the Nikkor 17-55mm f/2.8 lens.  It does not have VR and VR is a big deal for me.  I remember doing test shots with a Nikkor 50mm f/1.8 in one of Henry's stores before and frankly, when handheld, my Nikkor 18-200mm f/3.5-5.6 VR beats the 50mm in sharpness hands down, almost all the time. With the 17-55mm, would there be any difference?  To put it to the test, I brought out my Tamron 17-50mm f/2.8 and tried it with and without VC.  When shot with VC, the Tamron delivers sharp images almost all the time.  Without VC, very few images are sharp under normal room light conditions.  So, it makes a big difference to have VC.  Anyone that says otherwise must have a really stable hand or a really good camera so they can crank up the ISO to compensate for low lights.

On a tripod or in bright day light, the Nikkor 17-55mm f/2.8 would be a superb lens.  Otherwise, forget it.

Wednesday, October 17, 2012

Choosing a lens

Just yesterday, I was browsing for and reviewing the Nikkor 17-55mm f/2.8 lens.  It costs at least $800 used.  A few months ago, I was browsing for and reviewing the Nikkor 70-200mm f/.8 lens.  Again, this beast also costs at least $1300 used.  It begs the question:  do I really need any of these two lenses?  I like that they are really fast, but there is no VR.

ExposurePlot:  graphs of 234 photos.
Besides that question, my other question is, how often do I shoot in a certain range to justify such an expensive purchase?

I ran a quick search on Google and landed on one piece of free software called ExposurePlot.  I just had a quick look and I like it already.  I ran it against 234 photos I took at a niece's birthday party.  All the shots were made indoors with flash mostly.  I forgot now what ISO values or aperture settings I used.  This software answers this question in minutes.

I can see I left my camera on ISO 1600 the whole night, as shown by the big red bar.  Since I used Aperture Priority virtually all the time, with flash on, the shutter speed is maxed out at 1/60 seconds as shown by the big green bar.  I can see that a few times, I turned flash off, and they show up as those tiny green bars.

Now, for focal length--and this must be taken into context of an indoor party shoot--I spend most of the time shooting between 18-55mm (DX).  The graph converted my focal lengths into 35mm equivalents and I am not sure how to turn off that conversion yet.  I do shoot in the 70-200mm (DX) range but not as nearly often.  Overall, I can see that I do use the full 18-200mm range in a given night.

If I were to purchase a 17-55mm lens and a 70-200mm lens, I will likely use the 17-55mm much more often than the 70-200mm, but will I likely want to switch lenses during a party, or will I simply adapt (i.e., getting closer)?  I have brought just a 50mm lens to parties before and I was forced to adapt.  Hmmm...

I have to run now.  I will play with this software more a bit later.

Sunday, October 14, 2012

Sensor cleaning, nasty bunny

After the Henry's Exposure 2012 show, I decided to perform a wet cleaning on my sensor.

While I was at the show, I had my lens cleaned at this one booth for free (and they gave away a free Lenspen FilterKleaner.)  I did not know they would try to clean my sensor as well.  Well, they did.  They showed me their 6x magnification loupe with built-in LEDs.  The loupe is actually pretty cool.  It has an opening for a special lens pen to be inserted to clean the sensor.

Crop of image:  a persistent blob on my sensor!
I knew my sensor was probably dirty.  I hadn't cleaned it for a while and I have taken my camera to many dusty places and have switched lenses many times over.  So, I was not surprised to see tiny dust bunnies through the loupe.  They went to clean my sensor and I was really hoping it'd actually work, but unfortunately not.  The pen they used only smeared the dust bunnies and might have added more dust or some kind of residues from the cleaning tip.  After a couple of minutes, I told them "it's ok ... I'll do a wet cleaning." :-)  I'm sure they appreciated that.

Anyways, I went out to buy the Pec Pad sheets I mentioned a few months ago from Vistek.  The 100 sheets of Pec Pad came out to $14.68, including tax.  Each sheet can be cut in half and each half can be used two or three times by adjusting the sheet to use different parts of it--I used each half only twice.  This was the Copper Hill method.

With the Pec Pad sheets, I performed the cleaning four times.  There was one dust bunny that persists.  I still cannot clean it.  It appears in the lower left corner of the image, so on the sensor (looking from the front) it should be in the upper right corner.  I scrubbed the area a few times over but the dust hangs on.  I think I will get a loupe to take a closer look at the sensor.

UPDATE:  I ended up ordering a cheap 7x loupe from eBay.  The loupe has six LEDs.  With it, I'll be able to see what that dust bunny is.  I hope it's not between the sensor filter and the sensor itself!

Loose lens hood

Sagged bridge on my HB-35 lens hood.
When I bought my D300 a couple summers ago, it came with a Nikkor 18-200mm VR lens, but the lens had no hood.  As I already have an 18-200mm lens, I gave the new lens to my eldest brother and gave him the original hood that came with my older lens.  I decided then to buy an HB-35 lens hood from eBay.

Maybe the old adage rings true even for accessories like a lens hood.  You get what you pay for.  The lens hood was super cheap, shipped from China.  It worked great--well, it's just a lens hood--but there was one thing that irked me for over a year now.  The lens hood was a little loose.  It was easy to knock it off and it's something that is constantly on my mind on hiking excursions.  I remember having to deal with it in Cape Breton by inserting a strip of birch bark in between the hood and the barrel.  (I did not have any plastic or paper at the time.)  In contrast, the original lens hood had a tight fit and wouldn't easily get knocked off, although it is still very possible--I almost lose mine on a hiking trip in Costa Rica one year.

Today, I read somewhere someone had the idea of using tape around the barrel.  I guess that could work but tape may come off and leave a gluey residue behind.  Someone had melted the plastic of the hood for a better fit.  So, I thought I'd try that, and above right is the result.  Notice the imperfect bridge.  That was my melted hood.  I held a lighter under the hood at some distance but close enough to heat up the bridge where the small nodge is.  It could see the plastic starting to sag a little.  As soon as gravity started to bend the plastic, I remove the flame, and let the plastic cool down and harden once again.  Now, I've got a really good, tight fit!

Disclaimer:  If you try this, be very careful.  That plastic melts really quick and can easily catch fire too!  Do so at your own risk!

Fall colours, part 2

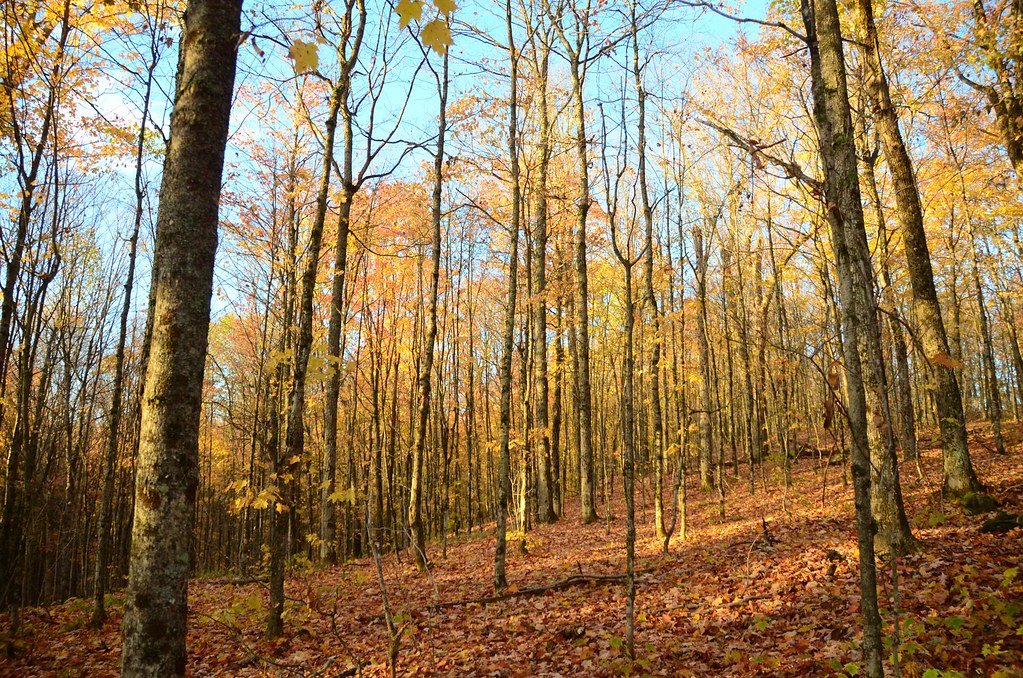
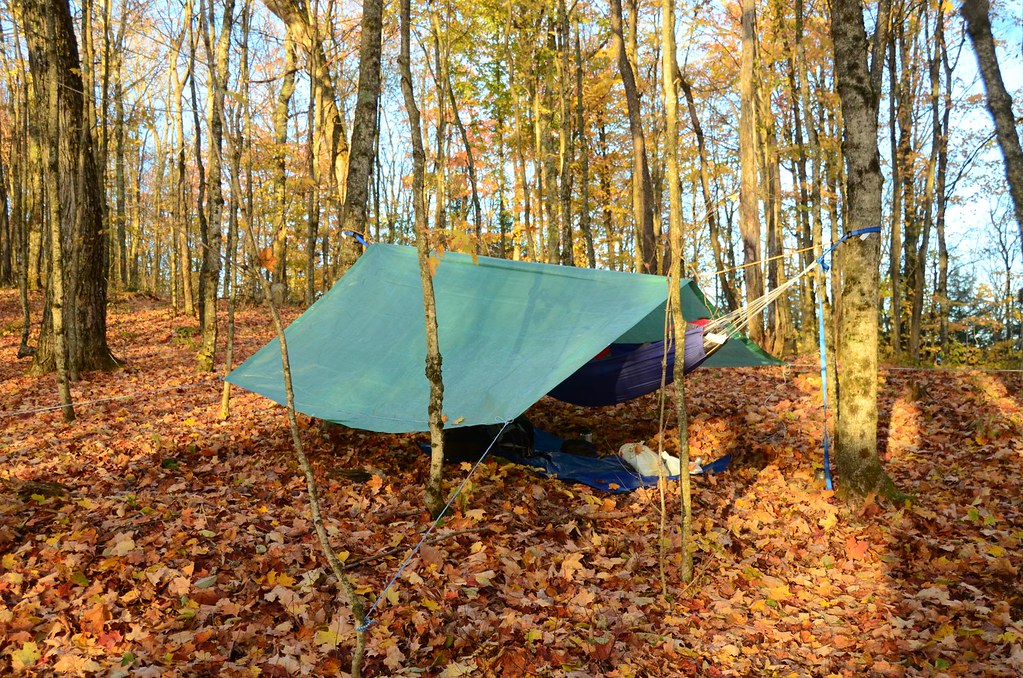
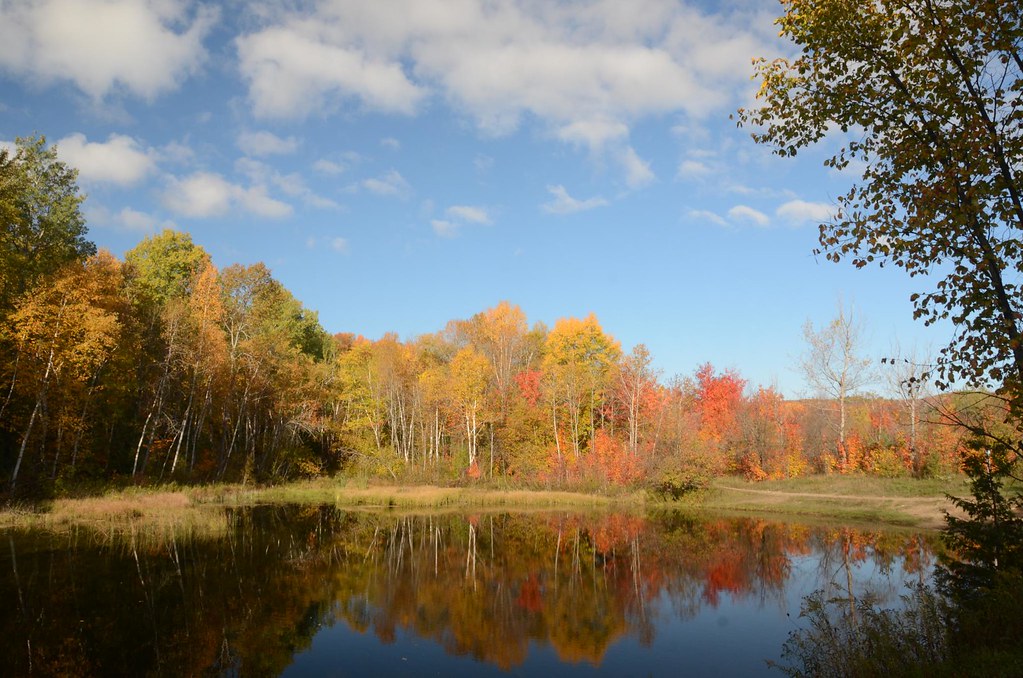
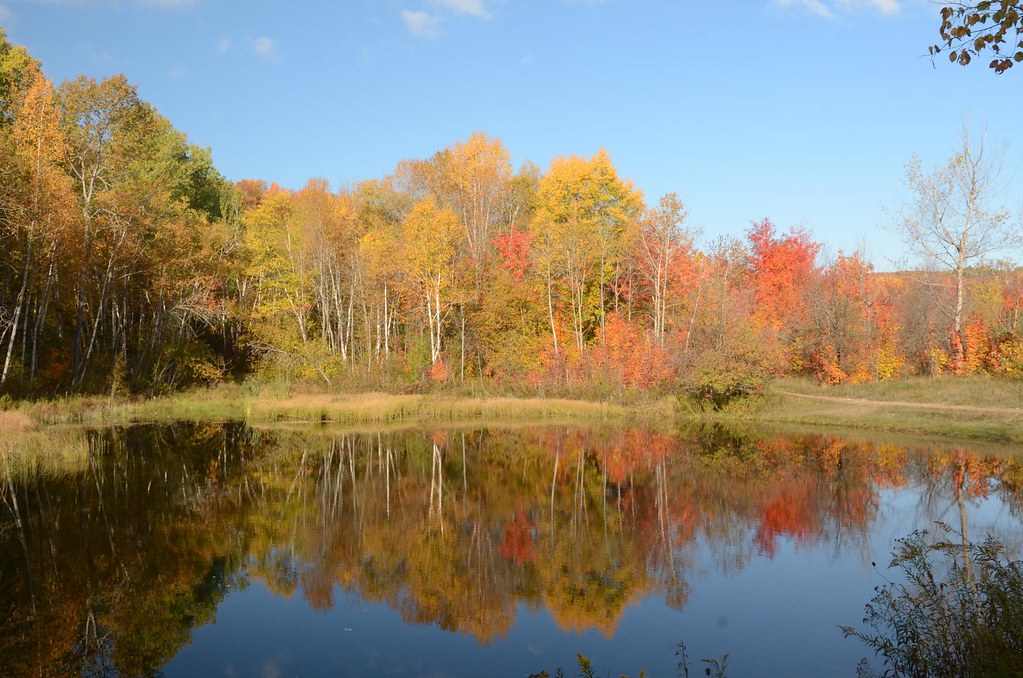
The further north you go, the fewer leaves there are in the canopy.  In fact, there isn't much of a canopy anymore in many parts of Muskoka region.  On a camping trip to Big Orillia Lake, although I did not actually camp on Big Orillia Lake, I took a few pictures of the fall colours.


Friday, October 12, 2012

Fall colours

When it gets a little cold, it's probably a good time to start getting your gears ready to capture the multitude of colours of the fall.  This past Monday, I went hiking with some friends at the Mono Cliffs park, a little north of Orangeville, ON.  The day started fairly cold.  We saw some bits of snow flakes in the air at 9am.  That did not deter us.  We hiked for about 1.5 hours to the top of Mono Cliffs and peered down the landscape.  It was beautiful.


Sunday, September 16, 2012

Picking the right time

There is nothing new here but how often does one actually make an effort to hike out there for the perfect time for photography?  That's the early morning and late night outings.

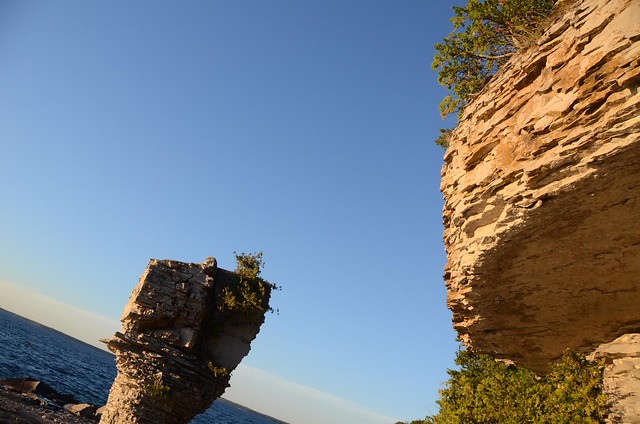
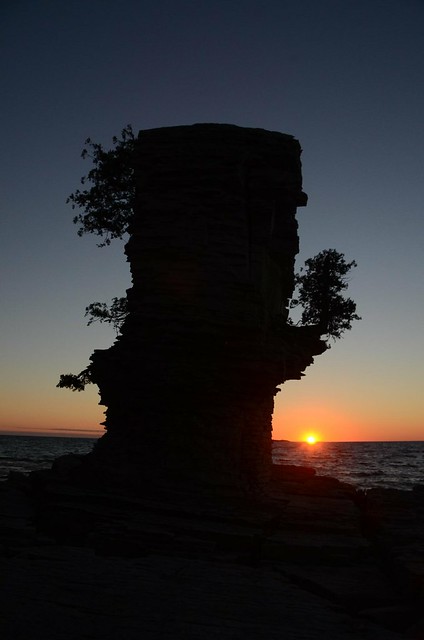
On my last camping trip on the Flowerpot Island in Tobermory, Ontario, I forced myself out of my cozy sleeping bag and hiked perhaps 20 minutes to the flowerpots to take pictures of the landscape.  I really liked the colours of the morning.  The yellow and blue and green came out really well.

Here are some photos I took that morning (most shots were exposed for the sky):

The two flowerpots together.

Top of a flowerpot (left) and part of a cliff (right).
Too bad my flash was not strong enough to light up the backside of the flowerpot.
Basking in the early sun.

Sunday, August 5, 2012

Graduated filters, part 2

Last year, I bought these cheap (about $6 a piece?) six graduated filters from an eBay seller from China or Malaysia (see:  http://photonfarmers.blogspot.ca/2011/07/graduated-filters.html.)

With all the small gadgets I bought, I tend to forget to carry the filters along on my trips.  The other day though, when my younger brother was here, we went down to a park to take some pictures of Toronto.  Cheap as they were, these filters worked quite well!  They can be used to bring the contrast between the sky and the land down a bit or to simply change the mood of the scene.

Here was a shot using an orange filter:


Not bad IMHO. :)

Sunday, July 22, 2012

Vibration Compensation on a tripod

It is popular knowledge that if you are shooting with a tripod, you should turn off VR on your Nikkor lens.  I have shot on tripods with my Nikkor lenses and even if I forget to turn VR off, the result is not bad--perhaps a slight blur that I don't really notice.  However, if you use a Tamron 17-50mm f/2.8 VC lens, beware of the VC on a tripod!  You must turn it off.

Here is a crop of a photo of the skyline of Toronto on a hazy night.  Except for the crop, the photo is unaltered in any way.  You can see these diagonal streaks of light and ghost images.  Well, that was VC at work.


I believe I wrote about this a long while ago but it was obvious I forgot about VC's issue on a tripod.

Saturday, July 7, 2012

Manfrotto MKC3-P01 tripod

So, my trip to Nova Scotia is over and I had a chance to take the Manfrotto MKC3-P01 tripod along.  I have to say I like this tripod a lot.  It is definitely not as sturdy as my Opus tripod but it is hiking-friendly.  I did a number of hikes in a couple of national parks and roamed around towns and cities carrying the tripod on my bag or holding it in my left hand.  I'd give it a good plus for being lightweight.  Because it was light, it was more likely that I would take it along on a long hike and it was worth it.  It got me some pictures I wanted.

The tripod is simple.  It has a ball head and four leg segments.  The ball head was useful to have.  I can make minor correction to the camera angle for composition.  However, I found it hard to adjust the camera for portrait shots.  The camera was heavy and would sag quite a bit after I locked down the tripod.  I would then have to compensate by either adjusting the tripod legs or readjust the camera on the ball head.

Notwithstanding these above issues, I give this tripod two thumbs up!

Water in your lens?

I was on my fifth day of a nine-day trip in Nova Scotia when I found out in the morning that water had condensed on the inside of my Nikkor 18-200mm lens.  The condensation sat on the glass elements as tiny water droplets.  Through the viewfinder, it was like looking through thick fog.  There was no way to shoot through it!

That was totally my fault.  The day before, rain was pouring down like cats and dogs and knowing my lens was not water resistant, I still went out and took pictures in the rain.  The air was moist and rain was beating on my camera body and lens.  I did not care so much about the camera as the D7000 is supposed to be somewhat weather sealed.  However, I did not take the same precautions I used to take with my lens.  Before, I would shoot in the rain but would always have a plastic cover to protect the lens.  I did not have anything this time around.  So, what happened?  Slowly, water got it into two chambers of the lens barrel!

I was quite mad when I realized I could no longer use the lens.  I brought two others lenses along but this 18-200mm was my primary, all-purpose lens.  On my drive from the Fundy National Park (in New Brunswick) to the Confederation Bridge, I started to think how I could get the moisture inside the lens out.  It would be nice to have a vacuum cleaner of some sort and suck all the moisture out, but it would not be that easy anyway.  Well, as luck would have it, the sky had cleared up, the sun was out, and the air was dry.  Inside my car, without air circulation, it would take a minute or so to feel the temperature rise.  I had an idea.

The lens can zoom in and out, so it has to draw air in and out.  When the lens zooms in, the barrel extends out, air is pulled in.  When the lens zooms out, the barrel retracts, and air is pushed out.  I let the temperature in my car rise.  It became warm and dry, perfect for drying out the inside of the lens!  I simply ran the lens through a couple of dozen zooming motions.  As I retracted and extended the lens barrel, I could feel and actually see moisture collecting on the outside of the barrel, drawn from inside lens.  I could clearly see the condensation inside the lens thinning out slowly, so I kept on zooming in and out until the inside lens elements were clear again..

I was so relieved the lens became usable once again.  A lesson learned.

Sunday, June 17, 2012

Trackitback

A local Zellers store is having liquidation sales of everything in the store.  I was browsing through some electronics the other day--not planning to buy anything--when I came across this "trackitback" package.  It's just a sticker you are buying, physically, but the sticker allows someone who found your lost camera to return it back to you.  Each package costed $9.97 but as Zellers is closing this store, they reduced the price down to $5.00.  On the day I was there, they further reduced it down to $1.  I picked up all three that remained.  I don't hope my $3 investment will pay off big time but just in case .... :-)

BUT ... I was just checking out trackitback.com this morning.  Their website was down.  Does that mean they are out of business or the website is just down?  I hope for the latter.  Trackitback is a good concept, assuming everyone is honest.

Addendum:  Uhh ... it looks like the company got disbanded earlier this year--why the heck was Zellers still be carrying their product!!??  See it for yourself:  http://www.wbrettwilson.ca/dragons-den-deals/trackitbackcom-inc/#/dragons-den-deals/trackitbackcom-inc/

Practice makes perfect

This old adage ... why is it that people don't follow it?  I talk the talk but don't walk the walk.  Just the other day, I was shooting a graduation event outdoors.  I did not think much about the event, only knowing that it would be outdoors.  I should have given it some more thoughts and prepare myself through the process, thinking of the different scenarios I might face and know how to dial my camera settings for the respective scenes.  Well, I did not, and so, I was shooting and thinking at the same time, how do I set the camera on high-speed sync with the flash gun!  I know there is a setting but as I scrolled through the menus, I realized I should have practiced the shots beforehand.  I gave up the search for the setting because I just did not have enough time.  It was hours after the event had concluded I started the remember--right, high-speed FP sync is not available in aperture-priority mode (which I was using)!  I had to switch to manual or shutter-priority mode.  Well, I will try to remember to practice before an event next time.

Sunday, June 10, 2012

QNAP TS-109 Pro II

My 600GB NAS that I built with Slackware Linux on an IDE-CF card, has been running quite smoothly over the last four years.  I have filled it to 83% capacity so far.  I think this NAS can go on for easily another few years by adding another 320GB drive to the RAID-5 array, but will I run it for that long?

The fan has been fairly noise over the last couple of years.  Because the NAS sits in another room, I don't really hear it so it does not bother me much.  Whenever I go into that room however, the noise is quite irritating.  I don't know how guests that are using that room can stand it.  Also, I kinda prefer a GUI interface for controlling the system instead of all command-line now.

Well, today, I decided I would buy a quiet NAS.  I found a QNAP TS-109 II on Craigslist for $165.  I went out last night to pick it up.  The NAS came with a 2TB drive, way more than my current NAS, but there is only one drive.  Eventually, I need to connect an external drive and configure the NAS to auto-sync to it (i.e., creating a RAID-1 system.)  Soon, my current NAS will be decommissioned .....

One note about the QNAP TS-109 II ... this NAS is Linux but does not support NFS out of the box.  However, I found an article that talks about hacking the NAS so it appears as a QNAP TS-109 Pro II, which will show the NFS option in the menu.  I followed the simple instructions and now got NFS shares running.  George Zhu's blog was where I found the instructions:  http://george.insideiphone.com/?p=614.

In case George Zhu's website is no longer accessible, I am copying and pasting the relevant instructions here:

  1. SSH onto your TS-209 II, then enter:
    mount -o loop /dev/mtdblock5 /tmp/config
    cd /tmp/config
  2. Now edit autorun.sh, add the following lines:
    ln -s /sbin/config_util /sbin/set_hwtype
    /sbin/set_hwtype 2
  3. Then unmount the partition:
    cd /
    umount /tmp/config
  4. Reboot

The instructions are for the TS-209 II but it works for the TS-109 II as well.  (I noticed a number of people use WinSCP and other tools for editing autorun.sh.  I just used the built-in "vi" editor to create the file--yeah, the autorun.sh did not exist--and set its permission with "chmod u+x autorun.sh".)  There is a second method mentioned in the blog but the first method seems to work just fine.

So now, I am going to order a 2TB external SATA drive and will connect it to the TS-109 Pro II NAS.  I think I will start shooting in RAW mode from here on since I have so much more space for RAW storage now.

Sunday, June 3, 2012

Pec-Pad for sensor wet cleaning

After reading many articles on the web about the Pec-Pad wipes, I am convinced the Sensor Swabs used to perform web cleaning of the CCD/CMOS sensors are just way over-priced.  Pec-Pad wipes will do and have done very well cleaning sensors over many years.  I just started using the Copper Hill method a week ago, and I am quite pleased with the result.  While I cannot recommend it to anyone, because of liability issues, I will certainly keep on using it for my own cleaning.  (Sending my camera in to Nikon for wet cleaning will easily set me back $50, and that's not yet including shipping and handling charges.)

The oddest things I found though ... I cannot find the Pec-Pad wipes on Henry's website.  In fact, there are only two sources for Pec-Pad wipes I can find in Canada:  on amazon.ca and at Vistek's.  The Pec-Pad 100 4x4 package sold through amazon.ca would cost me over $20 including tax and shipping.  I will just drop by Vistek's to pick one up for about $15 including tax.

It really sucks if you live too far away from a major city and would have to order these items online in Canada, but it sure beats $50 and time lost leaving your camera with Nikon.  If you follow the Copper Hill method however, just know it's not sanctioned by Nikon/Canon, so do so at your own risk.

Thursday, May 31, 2012

Tripod for travels

As I'm planning my trip to Nova Scotia, I remembered how I was traveling in Costa Rica with my tripod.  I used my OPUS OT-1104BH tripod perhaps only once back then and it was somewhat big and heavy to lug around.  Because of its size, I had to keep it in my larger backpack (inside its cardboard box for easy retrieval and stow-away.)  The benefit of having a tripod that heavy was diminished by the fact that I did not carry it around on my outings.  I did not mind so much that it was heavy (sturdy).  It was not hiking long distance.  It was that it was too big.

A couple of days ago, I purchased a Manfrotto MKC3-P01 tripod off someone on Craigslist.  The tripod is rated for 1.5kg load capacity, just barely enough for my D7000 and my heaviest lens.

The MKC3-P01 has a ball head.  Once tightened with the knob, it feels quite solid, enough for 1.5kg at least.  One thing I do not like about the ball head however is the quick release plate that is sold with it.  There is no safety locking pin that I see on the OT-1104BH.  I think it is possible to release the plate by accident and see my camera dropping to the ground.  I will have to be careful with the release lever!

Anyways, the specs are as follows (taken from Manfrotto's website):

SPECIFICATIONS


centre column
rapid
closed length
40.0 cm
Color
black color

column cross section
three-faceted

column tube diameter
22mm

front tilt
0° / +90° head tilt

leg angles
21°

leg cross section
oval
leg sections
5 number

material
aluminum legs and technopolymer
maximum height
165.0 cm
maximum height (with centre column down)
136.0 cm
minimum height
45.5 cm

panoramic rotation
360 degrees

plate type
quick release - with 1/4" screw

quick release
yes
load capacity
1.5 kg
weight
1 kg

Sunday, May 27, 2012

70-200mm

This subject comes back to haunt me every now and then.  I was at the Henry's Exposure Show with Joe.  He was at the Sigma booth trying out a few of their lenses.  While I was there, I saw their 70-200mm f/2.8 lens.  Sigma lenses come with ten years of warranty.  A seed of evil thoughts was embedded in my brain since then.  Today, I was at my niece's birthday party when I was so tempted to go back to the show to buy the lens.  The temptation was driven also by the thought that it was $1100 but after checking out its price on Henry's website, I believe it was for another lens I saw, not for the 70-200mm f/2.8.  At most, I believe the lenses had a discount of $200 at the show.  So, it probably would have costed me $1200 + tax.  That is not a small amount.  Yet, I want a 70-200mm f/2.8.  Why, I thought?  Where am I going to use it?  Weddings?  I could be a second shooter.  Parties?  Sure.  I am planning a trip to Nova Scotia.  Will I be able to make use of it there, or will my current arsenal of lenses do?  They should do, although they will be somewhat of a compromise.  In the end, I was able to fight the temptation.  I am at home, wondering how I'd feel if I had actually bought it.  *sigh*

I spend too much time hoarding lenses and not using them fully.  My new year's resolution was to make a great photo with each of my lenses.  So far, I think I have made at least one great photo with the 50mm f/1.4 lens and the 18-200mm.  The other lenses still have not had their opportunities yet.

Copper Hill Sensor Swipe

The Henry's Exposure Show is now over.  I attended the show yesterday for about five hours.  It was good.  I walked out of the show with two Copper Hill Sensor Swipe kits for wet sensor cleaning, that I purchased for $2 each from Henry's clearance section (Henry's used to sell them for $25 each!!).

A Copper Hill Sensor Swipe kit comes with an 18mm swab and a PecPad sheet.  The PecPad sheet was wrapped around the swab ready for use out of the bag, and the 18mm width of the swab was perfect for the D7000 sensor as it covers pretty the entire height of the sensor.  I used my old sensor cleaning solution I bought from Aden Camera a while ago and applied a few drops onto the PedPad.  One swipe across the sensor almost did the job--my dust bunnies were well bonded to the surface.  I had to repeat the process one more time to get a perfectly clean sensor.  (The process involved swiping across the sensor with one side of the PecPad, and then go back (or go over in the same direction) with the other side of the PecPad.)

On the second attempt, because you are not supposed to be re-using the same side of the PecPad, I decided to unwrap the PecPad and reposition the swab at a different location on the PecPad.  It occurred to me then that the PecPad is held together with tape.  Uh, yeah, tape.  Well, that was stupid I thought.  Now, I can no longer use a whole section of the PecPad covered by the tape because of potential adhesive debris left on the PecPad.  What I could do though now, is to use the other side of the PecPad and cut the PecPad into disposable strips.

I will not follow the steps given on the instruction sheet that came with the kit.  Instead, on Copper Hill's website, there are these better instructions:  http://www.copperhillimages.com/index.php?pr=Tutorials2.  Basically, you cut the PecPad into strips.  After an application, throw the strips away.

http://www.copperhillimages.com/images/StripPrep.jpg

Friday, May 25, 2012

14.7MP Canon IXUS 980 IS

Well, it's gone.  I bought the 14.7MP Canon IXUS 980 IS in the fall of last year I think but never really used it.  I did take it to a restaurant once but the problem is, I am so spoiled with the DSLRs I cannot really use a point-and-shoot anymore (for indoor shots).

Sunday, May 6, 2012

To sell or not to sell

I put up my 80-400mm for sell a few weeks ago.  I kinda forgot about it.  Some scammers had replied to the ad and today, I just received another enquiry.  This last enquiry may be real--I really don't know but it could be another scammer.  Anyway, I am really wondering if I should let go of this lens.  I have taken some really nice photos with this lens and the only reason why I considered selling it is only because I take it out only one or twice a year.  Is it worth keeping it around?  I am not so sure anymore.  Will I miss the 80-400mm focal length range?  Maybe.  Do I need the money from selling it?  I could use it toward a Nikkor 70-200mm f/2.8 lens. :)  Should I sell it then?  I do have an old Nikkor 500mm prime lens.  I have taken it out only once over the past four years.

I do have a habit of selling something I think I no longer like to use, only to buy it back later.  What a conundrum.

Spot Metering vs. Matrix Metering

Modern cameras come equipped with this cool feature call “matrix metering” – basically the camera’s ability to analyze the scene and “figure” out how much light is needed for the exposure.  This is a real cool and real convenient feature and I think it made photography a lot more accessible to the masses.

At the same time, just because the camera figure out the amount of time it needs to make the exposure, it doesn’t mean it’s the artistically correct exposure – this the concept I first came across from reading Bryan Peterson’s “Understanding Exposure” book.  At the same time, I was reassured by many sources (in-print, online, Nikon, or other “experts”) that Nikon has a very good matrix metering system and it works well in “most” cases.   So I have been leaving my DSLR on matrix metering all these time.

Last time, I noticed the moon was just spectacular and decide to capture the moment with my D5100.  I put the camera on a tripod, get a good focus (AF-A) and snapped a exposure, and this is what I got.

DSC_3250

Well, it’s not bad, but I was hoping I could get something a little better…  So, I snapped a couple more exposures, and I got


DSC_3251

DSC_3256

Clearly I wasn’t getting anywhere with this matrix metering, so I decided to change it to good old spot metering and see what I can do with. 

DSC_3265

DSC_3267

I then decided to see what else I can with spot metering.  Simply by metering from different spots, I got very different results from the same target:

 DSC_3269DSC_3271DSC_3274DSC_3276

I think this is where Photography becomes a real art - I can, using the tools I have available and my creativity to decide how I would want to interpret a given scene and communicate that to others.   I don’t know if I would ever be fractionally successful as Bryan Peterson, but I think I have just crossed over from snap-shooters to a artistic-shooter.  Smile

Invasion of What?

What are these bugs? I've never seen them before. I saw them at my parents' place the other day. Lots of them in soil or grassy areas.